

Why oyster mushrooms are a good first grow
Oyster mushrooms (the Pleurotus family) grow fast, fruit in big clusters and forgive the odd mistake. From a ready-to-fruit block, most are ready to pick within about a week or two, and a block usually fruits more than once.
The main thing to get right is the match between variety and temperature. Some oysters like it cool, and others are happy in a warm room. Choose the right one for your house and the season, and the rest is humidity and fresh air.
Which oyster mushroom should you grow?
| Variety | Fruiting temperature | Humidity | Time to harvest |
|---|---|---|---|
| Snow white oyster | 15–21°C (best 15–17°C) | 85–90% | 7–10 days |
| Blue oyster | 10–21°C (best 15–17°C) | 85–90% | 7–10 days |
| Yellow oyster | 18–30°C (best 18–24°C) | 90–95% | 7–14 days |
| Phoenix oyster | 18–27°C (best 18–24°C) | 85–90% | 5–7 days |
| Pink oyster | 18–30°C (best 18–24°C) | 85–90% | 5–7 days |
| Warm white oyster | 10–30°C (best 18–24°C) | 85–90% | 5–7 days |
Times to harvest are from a ready-to-fruit block, as printed on each Flush Block. Cool-season oysters, snow white and blue, do best at 15–17°C. Warm-season oysters, yellow, phoenix, pink and warm white, do best at 18–24°C, and some will keep fruiting in a warmer room.
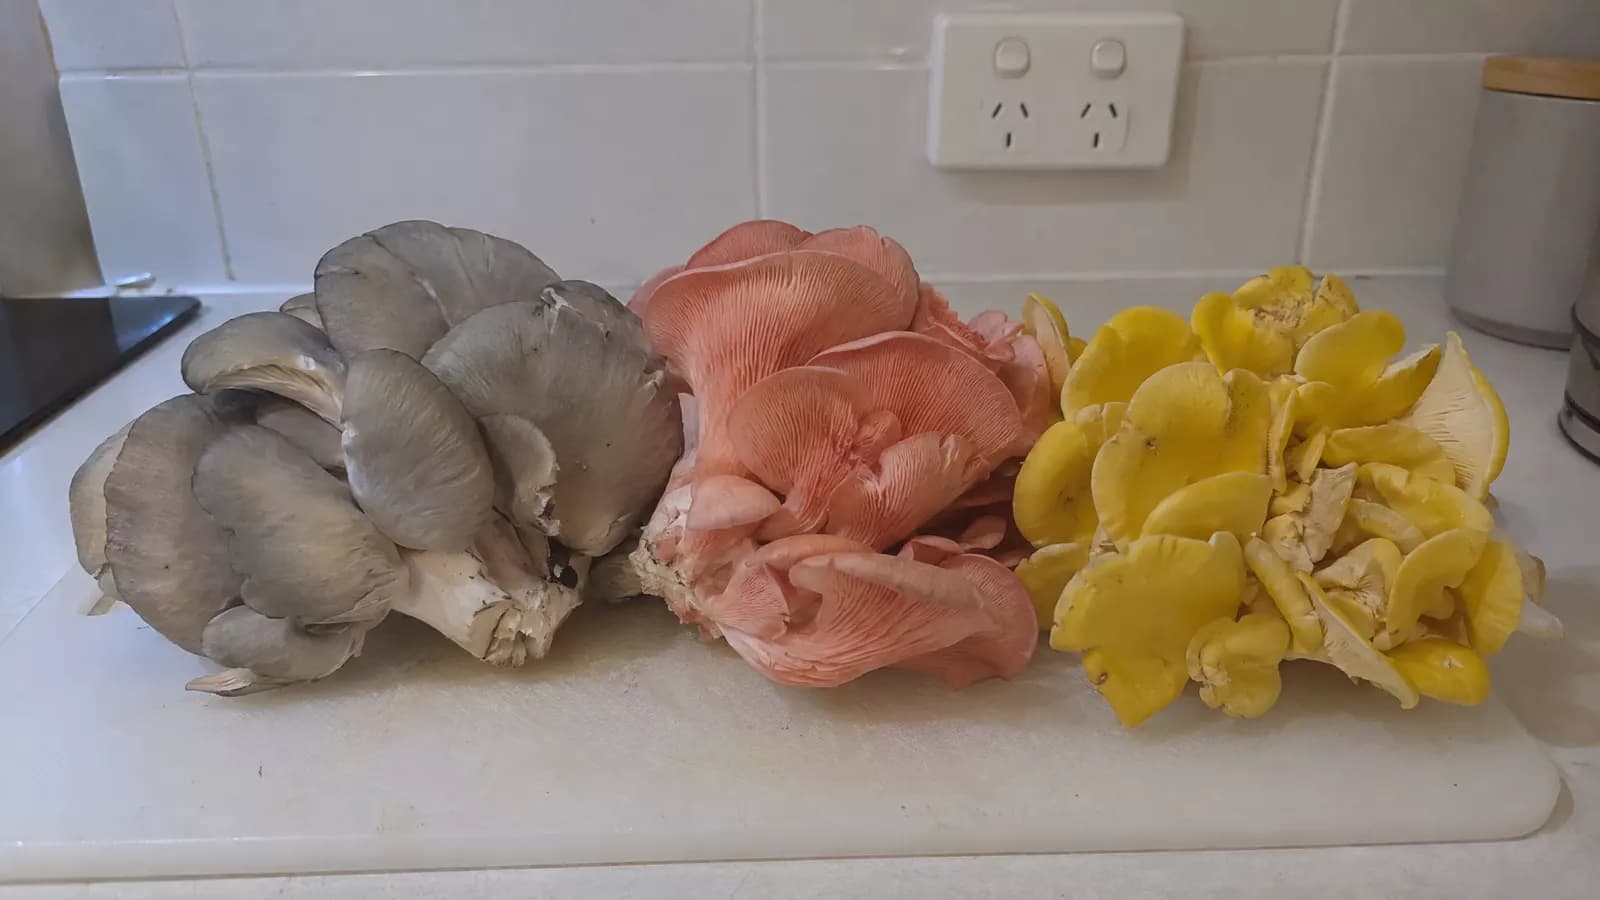
Snow white oyster
Clusters of white oyster mushrooms with a mild savoury flavour and a tender texture. Crisp, clean and quick, it is the easiest first grow there is. Good in stir-fries, pasta, soups and gentle roasting. See the Snow White Oyster Flush Block.
Blue oyster
Slate blue-grey caps with a rich savoury flavour and a meaty texture. It browns beautifully in a hot pan and works well in tacos, pasta and risotto. Like snow white, it prefers the cooler months. See the Blue Oyster Flush Block.
Yellow (golden) oyster
Bright yellow clusters with a delicate, nutty flavour and a crisp-tender texture, almost too pretty to cook. You will also see it called golden oyster, and the Flush preset is called Gold Oyster. Cook it quickly in a hot pan. See the Yellow Oyster Flush Block.
Phoenix oyster
A graceful summer oyster with pale, fan-shaped caps, a delicate savoury flavour and a hint of almond sweetness. Excellent sautéed, grilled or folded through noodles and rice. See the Phoenix Oyster Flush Block.
Pink oyster grow kit
Pink oyster is the showpiece: ruffled coral-pink clusters with a savoury, lightly smoky flavour when cooked. It is one of the warmest-growing oysters, fruiting at up to 30°C, and one of the fastest, ready in about 5–7 days. Harvest and cook it promptly for the best colour and texture, because the pink fades with time and heat. See the Pink Oyster Flush Block.
Warm white oyster
Cream-capped and mellow, with a silky texture that turns to velvet in the pan. It has the widest fruiting range of the six, 10–30°C, which makes it a good choice for a house that swings between seasons. Use it in pasta, curries, stir-fries and roasting. See the Warm White Oyster Flush Block.
King oyster and black pearl are oysters too, but they grow differently: thick, meaty stems with small caps, and they take longer. They have their own guide, How to grow king oyster mushrooms at home.
How to grow oyster mushrooms in Flush
- Prepare the block. Tear open the perforated tab on top of the block's box and remove the cut-out panel. Wipe a clean knife or pair of scissors with alcohol, such as isopropyl alcohol or an alcohol wipe, and let it dry. Then cut a small X in the bag underneath, a couple of centimetres across. Sterilising the blade stops it carrying mould spores into the block.
- Load it. Place the block inside the cabinet and close the door.
- Choose the preset. In Basic mode, open the Oyster preset group and choose your variety. The presets hold Snow White Oyster and Blue Oyster at 16°C, Gold Oyster and Phoenix Oyster at 22°C, Warm White Oyster at 23°C, Pink Oyster at 24°C, all with 88% humidity and 650 ppm CO₂. Advanced mode lets you steer within the ranges in the table instead.
- Top up the water. Keep the reservoir filled with clean drinking water. A full reservoir lasts at least a week, and Flush tells you on screen when it is running low.
- Leave the door shut. Pins, the first tiny mushrooms, can appear within days. Try not to open the door too often while they grow, because the cabinet is holding the climate behind it.
- Harvest. Pink, phoenix and warm white oyster are usually ready in about 5–7 days, snow white and blue in about 7–10 days, and yellow oyster in about 7–14 days.
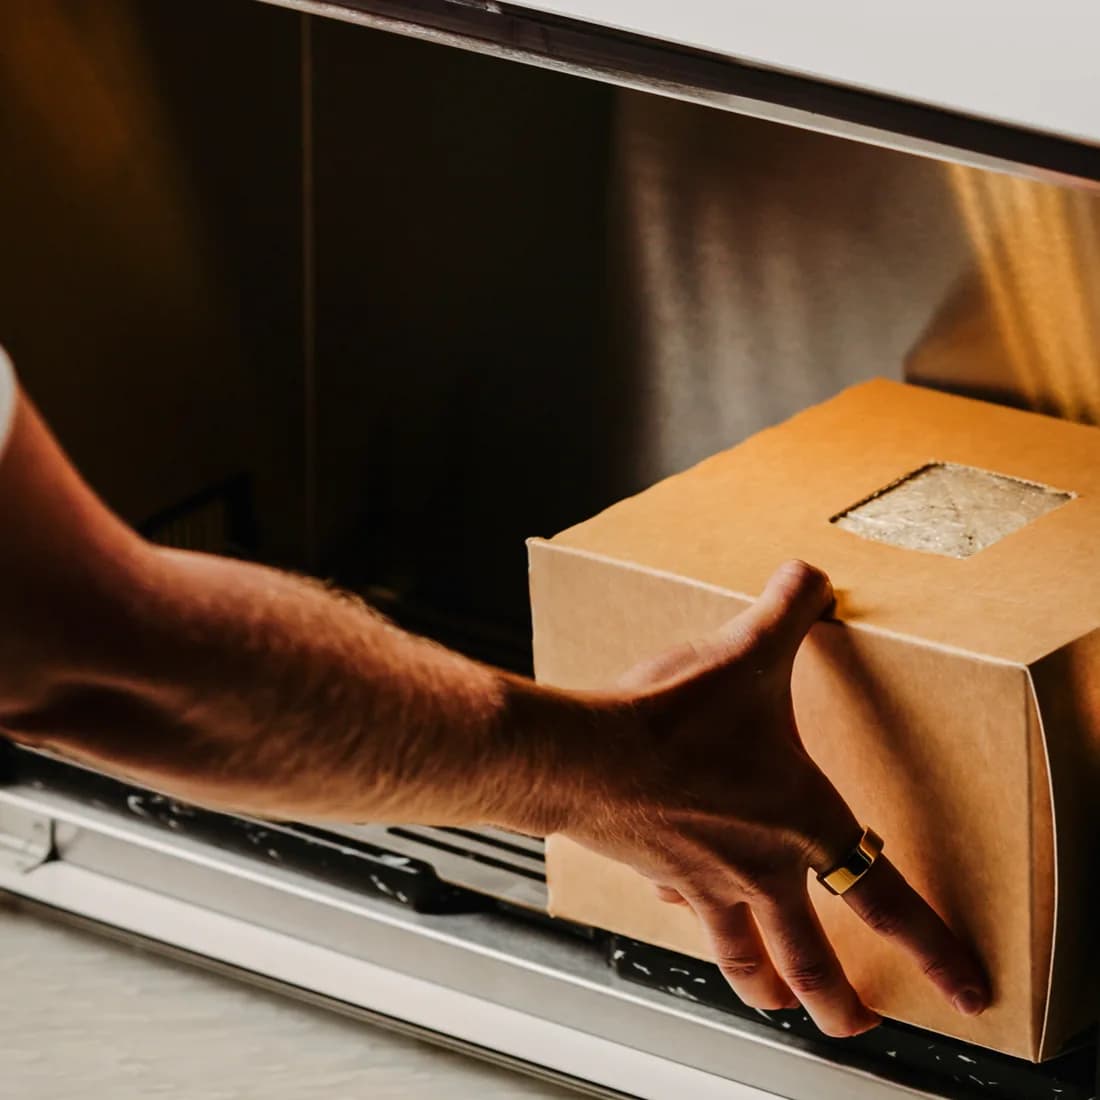
Growing two blocks at once? Flush holds one or two blocks in one chamber, so both share one climate. Varieties with identical presets pair best: snow white oyster with blue oyster, yellow oyster with phoenix oyster.
New to Flush? The set-up guide walks through your first grow.
How to grow an oyster mushroom kit without a cabinet
Oysters are the easiest variety to grow without Flush, but it still takes daily attention. Outside a controlled environment you are managing humidity and fresh air yourself, and results vary a lot with the room and the season.
- Choose a variety for the season. In winter, or in a cool house, grow snow white or blue oyster. In summer, choose pink, yellow, phoenix or warm white.
- Pick a spot. Somewhere bright but out of direct sun, away from heaters and air-conditioning vents. A laundry or a kitchen corner works.
- Prepare the block. Sterilise a knife or scissors with alcohol, let it dry, and cut a small X in the bag where you want the mushrooms to grow.
- Keep it humid. Mist the air around the cut several times a day so it never dries out. A loose, clear plastic cover with a few holes in it helps hold moisture in. Mist around the young mushrooms rather than soaking them.
- Give it plenty of fresh air. Oysters are hungry for it. Lift or vent the cover at least once a day. Without fresh air, carbon dioxide builds up around the block.
Common oyster problems
- Long stems and tiny caps: not enough fresh air. Higher CO₂ makes stems stretch, and lower CO₂ (more fresh air) gives well-formed caps.
- Dry, cracked or crispy edges: the air is too dry. Mist more often, or cover the block loosely.
- No pins long after the time to harvest: check the temperature. A cool-season oyster in a hot room, or a warm-season one in a cold room, can stall.
- Green, black or other coloured patches on the block: that is mould, not mushroom. Do not eat anything from a mouldy block. Throw it out and start again.
Weighing up a tent or chamber instead? See Mushroom grow tent vs fruiting chamber vs Flush, or our wider guide to growing gourmet mushrooms at home.
When and how to harvest oyster mushrooms
Pick oysters when the caps are fully formed, before their edges start to flatten out and turn upwards. At that point they have reached their best texture. Left longer, they turn tougher and drop lots of fine spores, which you will see as a white or coloured dust around the block.
Harvest the whole cluster at once. Hold it at the base and twist it off the block, or cut it with a clean knife. Most blocks fruit more than once. The first flush is usually the largest, with smaller ones after it, and the block is finished when it stops producing.
How to cook oyster mushrooms
Oyster mushrooms cook quickly and brown well. The simple pan-fry below works for every variety in this guide.
- Clean them lightly. Home-grown oysters are clean. Brush off any bits of block rather than washing them, because they soak up water.
- Trim and tear. Cut off the tough base where the cluster joins. Tear the caps into strips along the gills, and leave small ones whole.
- Use a hot pan and do not crowd it. Heat a little oil until it shimmers, then add the mushrooms in a single layer. Cook in batches if you need to.
- Leave them alone. Let them sit for a couple of minutes until the underside is golden, then turn them and brown the other side.
- Finish with flavour. Add a knob of butter, a crushed garlic clove and a pinch of salt for the last minute. A splash of soy sauce or a squeeze of lemon also works.
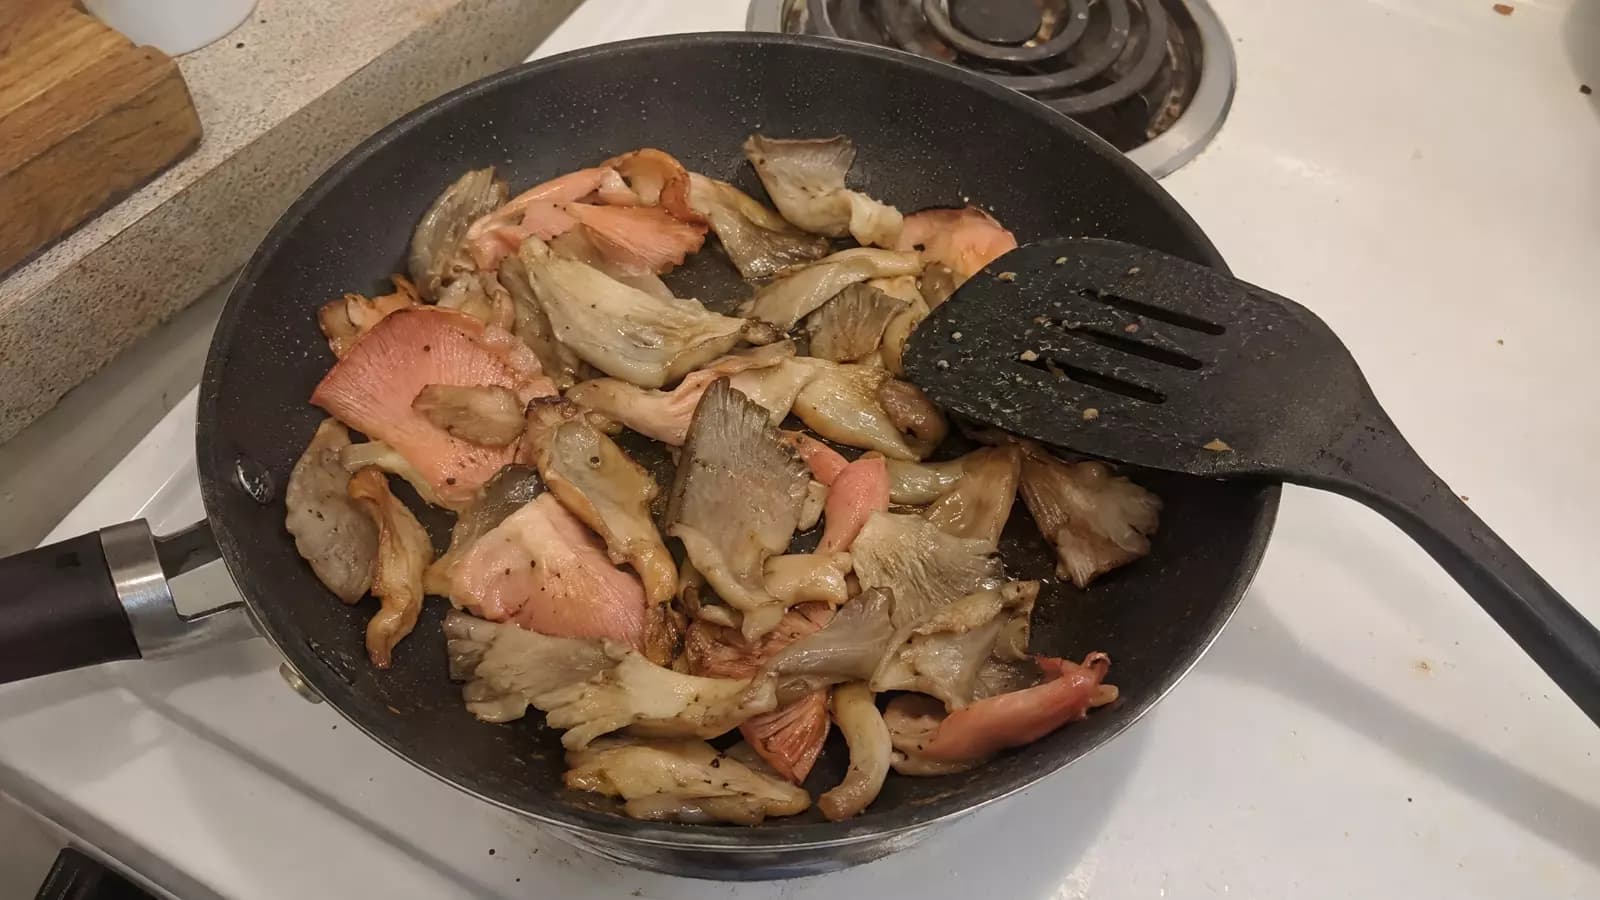
From there, fold them through pasta or risotto, pile them on toast, add them to stir-fries, noodles and curries, or tuck them into tacos. Blue oyster is the meatiest for tacos and toast, yellow and pink bring colour to a stir-fry, and snow white and warm white suit creamy pasta and soups.
Oyster mushrooms are best cooked rather than eaten raw. They are also best eaten soon after picking. If you need to keep them, store them in a paper bag in the fridge and use them within a few days. Pink oyster keeps least well, so cook it first.
Common questions
How long do oyster mushrooms take to grow?
From a ready-to-fruit block, phoenix, pink and warm white oyster take about 5–7 days. Snow white and blue oyster take about 7–10 days, and yellow oyster about 7–14 days.
Are oyster mushrooms easy to grow at home?
Yes. From a ready-to-fruit block they are the easiest gourmet mushroom to start with. The block arrives already colonised, so you only need to keep it humid, give it fresh air and match the variety to the temperature.
Which oyster mushroom grows best in summer?
Pink, yellow, phoenix and warm white oyster cope best with a warm room. Pink and yellow oyster fruit at up to 30°C. Without a cabinet, save snow white and blue oyster for the cooler months.
Can I grow an oyster mushroom kit without a Flush cabinet?
You can, but it is harder. Outside a controlled environment you are managing humidity and fresh air yourself, and results vary a lot with the room and the season.
How do you cook oyster mushrooms?
Tear them into strips and fry them in a single layer in a hot, lightly oiled pan until golden on both sides, then finish with butter, garlic and salt. Do not crowd the pan, or they steam instead of browning.
Do you wash oyster mushrooms before cooking?
Home-grown oysters rarely need it. Brush off any bits of block instead, because washed mushrooms soak up water and do not brown as well.